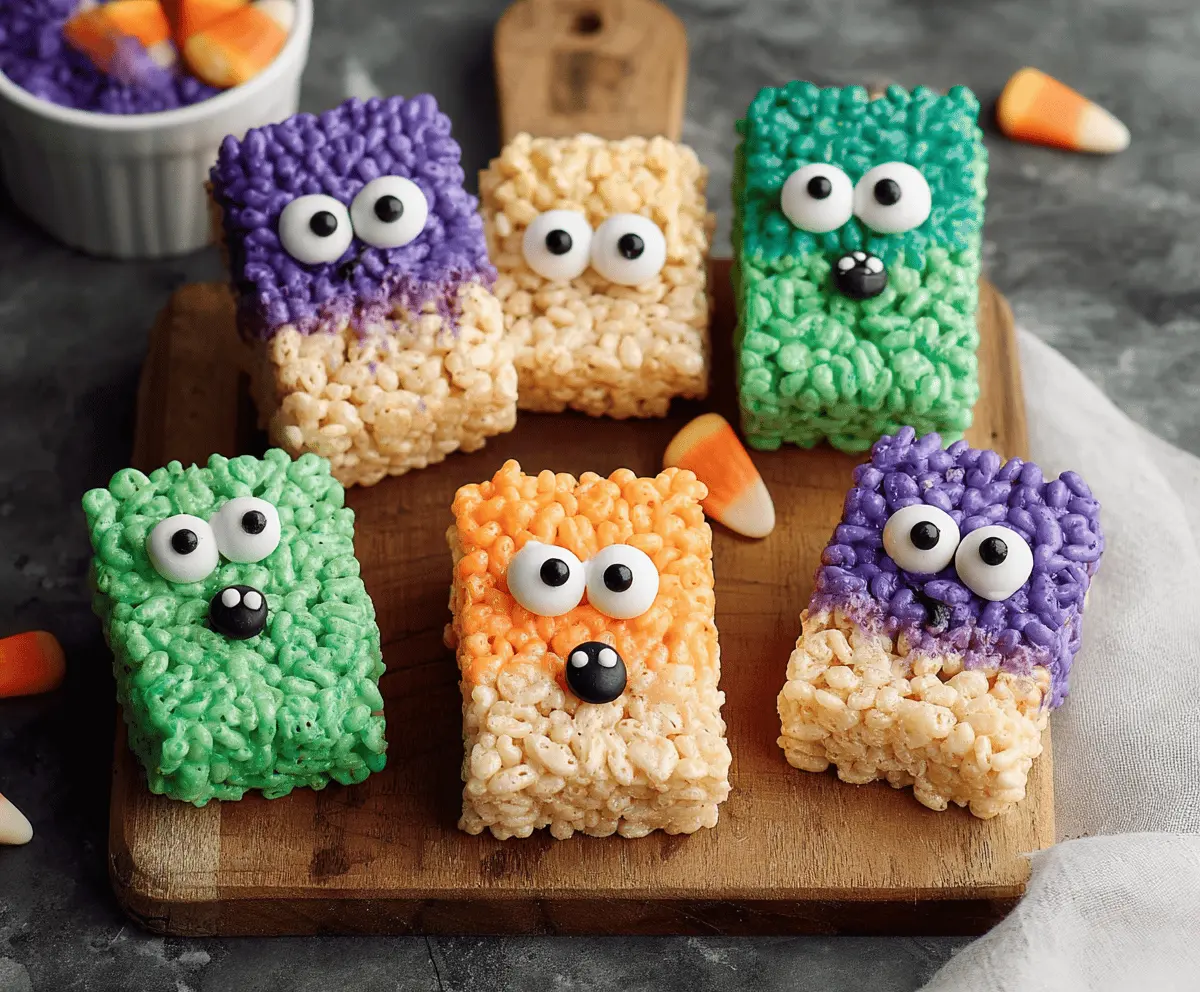
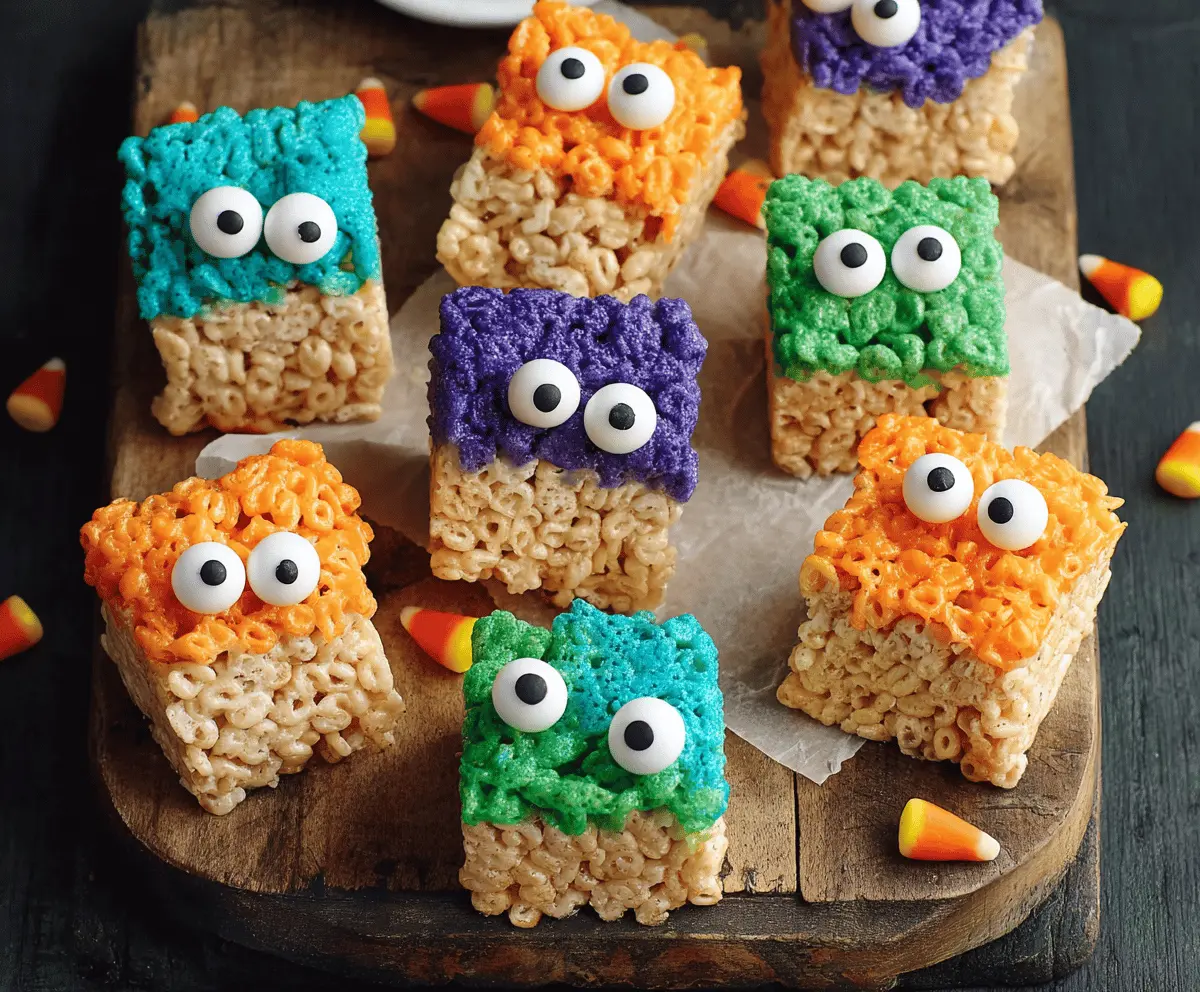
These Monster Rice Krispie Treats are sweet, fun, and super easy to make! With melted marshmallows and colorful candies, they’re perfect for kids and adults alike.
You can’t help but smile when you see these cute little monsters. I love adding extra sprinkles for a pop of color! Who can resist a monster that looks this tasty? 🎉
Key Ingredients & Substitutions
Rice Krispies cereal: This is the star of the show! You can use any crisped rice cereal, but Rice Krispies give that classic taste and texture. If you want a gluten-free option, just make sure to check the label!
Mini marshmallows: These help bind everything together. You can substitute with regular marshmallows if that’s what you have, just cut them into smaller pieces for easier melting.
Unsalted butter: This adds flavor and helps with melting the marshmallows. You can replace it with coconut oil for a dairy-free version or margarine for a butter substitute.
Gel food coloring: This helps create vibrant colors for your monster treats. If you don’t have gel, liquid food coloring can work too, just be aware that it may not be as bright. You can always skip this and let the natural color shine!
Candy eyeballs: These make your treats fun and cute! If you can’t find them, use chocolate chips, or even small round candies like M&M’s as an alternative.
What’s the Best Way to Melt Marshmallows Without Burning Them?
Melting marshmallows can be tricky! To ensure you don’t end up with burnt marshmallows, follow these steps:
- Keep the heat low. This prevents scorching and allows for gentle melting.
- Stir constantly. This helps the marshmallows melt evenly and reduces the risk of burning.
- Remove from heat right when they’re smooth. Overheating can cause them to lose that gooey texture.
- Be quick when mixing with the Rice Krispies. The marshmallow mixture will start to set as it cools, so don’t delay!
With these tips, you’ll have perfectly melted marshmallows every time, making your Monster Rice Krispie Treats a hit!
Monster Rice Krispie Treats
Ingredients:
- 6 cups Rice Krispies cereal
- 4 cups mini marshmallows (about 10 oz)
- 3 tablespoons unsalted butter
- Gel food coloring (purple, green, orange, blue)
- Candy eyeballs (available at baking supply stores)
- Cooking spray or butter (for greasing hands and pan)
- Candy corn (optional, for decoration)
Time Needed:
This delightful recipe takes about 15 minutes of prep time, plus 30 minutes to cool and set. In just under an hour, you can whip up these fun and colorful treats!
Step-by-Step Instructions:
1. Prepare Your Pan:
Start by greasing a 9×13 inch baking pan lightly with butter or cooking spray to prevent sticking. It’s also a good idea to have a buttered surface or parchment paper handy to help shape your treats later on.
2. Melt the Butter:
In a large pot over low heat, melt the butter. Keep an eye on it, as you don’t want it to brown. Once melted, it’s time to add the marshmallows!
3. Add the Marshmallows:
Stir in the mini marshmallows with a spatula or wooden spoon, blending continuously until they’re completely melted and smooth. Once melted, remove the pot from the heat to avoid overcooking.
4. Color Your Marshmallow Mixture:
Divide the melted marshmallow mixture into separate bowls based on how many colors you want to use. Add a few drops of gel food coloring to each bowl and mix well until you achieve bright, vibrant colors like purple, green, orange, and blue!
5. Mix with Rice Krispies:
For each color, take about 1 to 1 ½ cups of Rice Krispies cereal and gently fold it into the colored marshmallow mixture using a spatula. Make sure every piece is coated and mixed in well.
6. Create the Base Layer:
Spread half of the plain Rice Krispies cereal evenly in the prepared pan to form a solid base layer for your treat.
7. Add the Colored Layers:
Working quickly, take one colored mixture and spread it over the base layer in the pan. Pat it down lightly to compact it. Repeat this process with your other colored mixtures, layering them side by side or on top of each other, as you prefer!
8. Cool and Set:
Let the entire mixture cool and set for about 30 minutes. This will help the treats firm up to make it easier to cut them later.
9. Cut and Decorate:
Once they are firm, use a sharp knife that’s lightly greased with butter to cut the treats into squares. Place the squares on a serving plate or tray.
10. Add the Candy Eyeballs:
To make your treats come alive, place candy eyeballs on top of each square using a small dab of melted marshmallow or frosting to hold them in place.
11. Optional Decoration:
If you want to elevate the fun, you can decorate the serving platter with candy corn around the treats for an extra festive touch!
12. Serve and Enjoy:
These colorful Monster Rice Krispie Treats are now ready to be enjoyed! Perfect for Halloween, birthday parties, or any fun gathering—watch them disappear!
With their bright colors and playful looks, these treats are bound to bring smiles to everyone’s faces. Happy munching!”
Can I Use Different Types of Cereal?
Absolutely! While Rice Krispies are traditional, you can substitute them with any crisped rice cereal. If you want a fun twist, consider using Cocoa Krispies for a chocolate flavor or even fruity cereals for different tastes!
How Can I Store Leftover Treats?
Store any leftover Monster Rice Krispie Treats in an airtight container at room temperature. They’ll stay fresh for up to 3 days. If you refrigerate them, they may become a bit hard, so it’s best to enjoy them at room temperature!
Can I Make These Treats Vegan?
Yes! To make these treats vegan, use dairy-free butter and ensure the mini marshmallows are vegan, as some brands contain gelatin. Check the labels carefully, and your monster treats will be suited for everyone!
What If I Don’t Have Gel Food Coloring?
No worries! If you don’t have gel food coloring, you can use liquid food coloring instead. Just keep in mind it may not be as vibrant, so you might need to use a bit more. You can also skip coloring altogether or experiment with natural colorings like beet juice or turmeric for a fun twist!