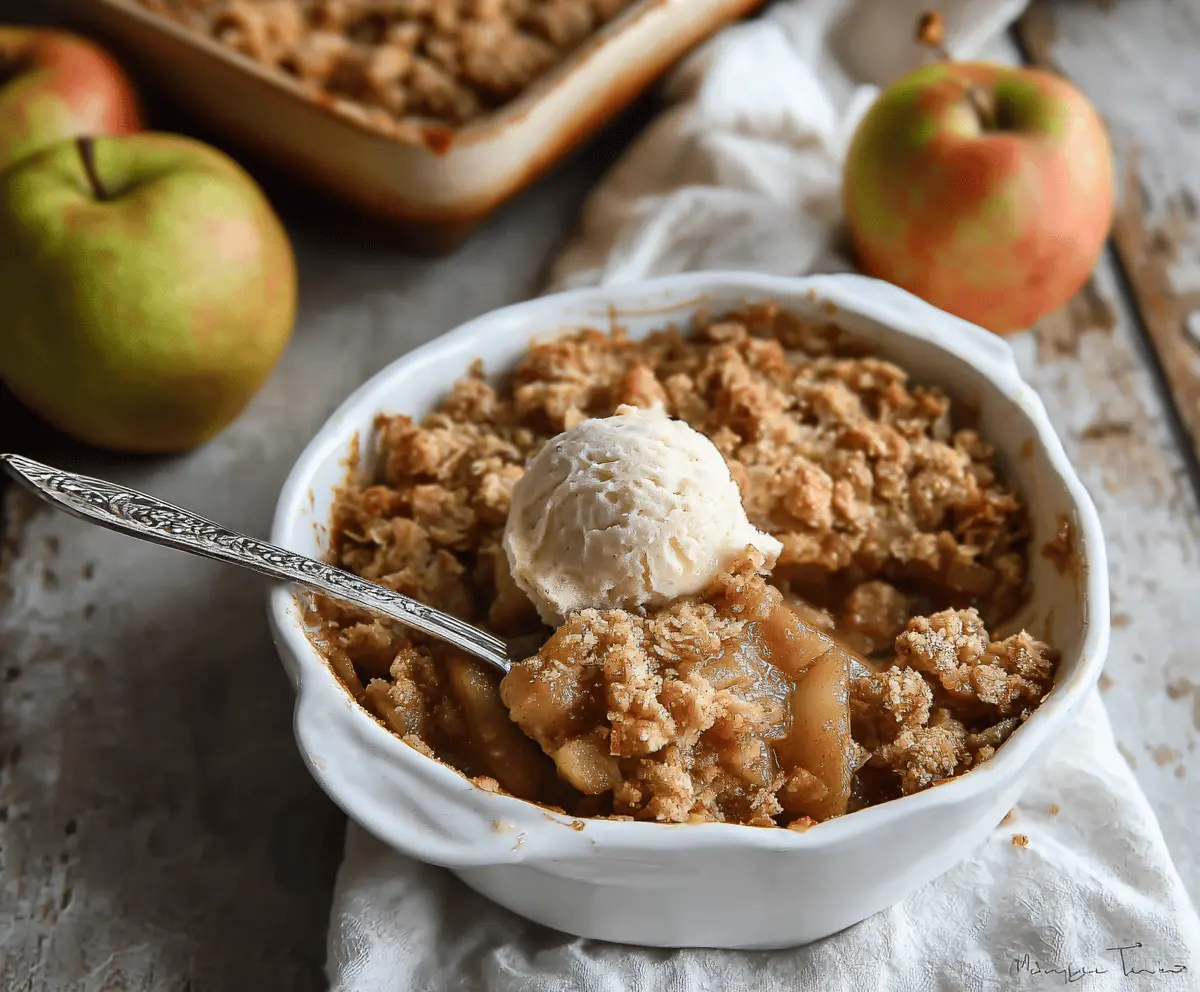
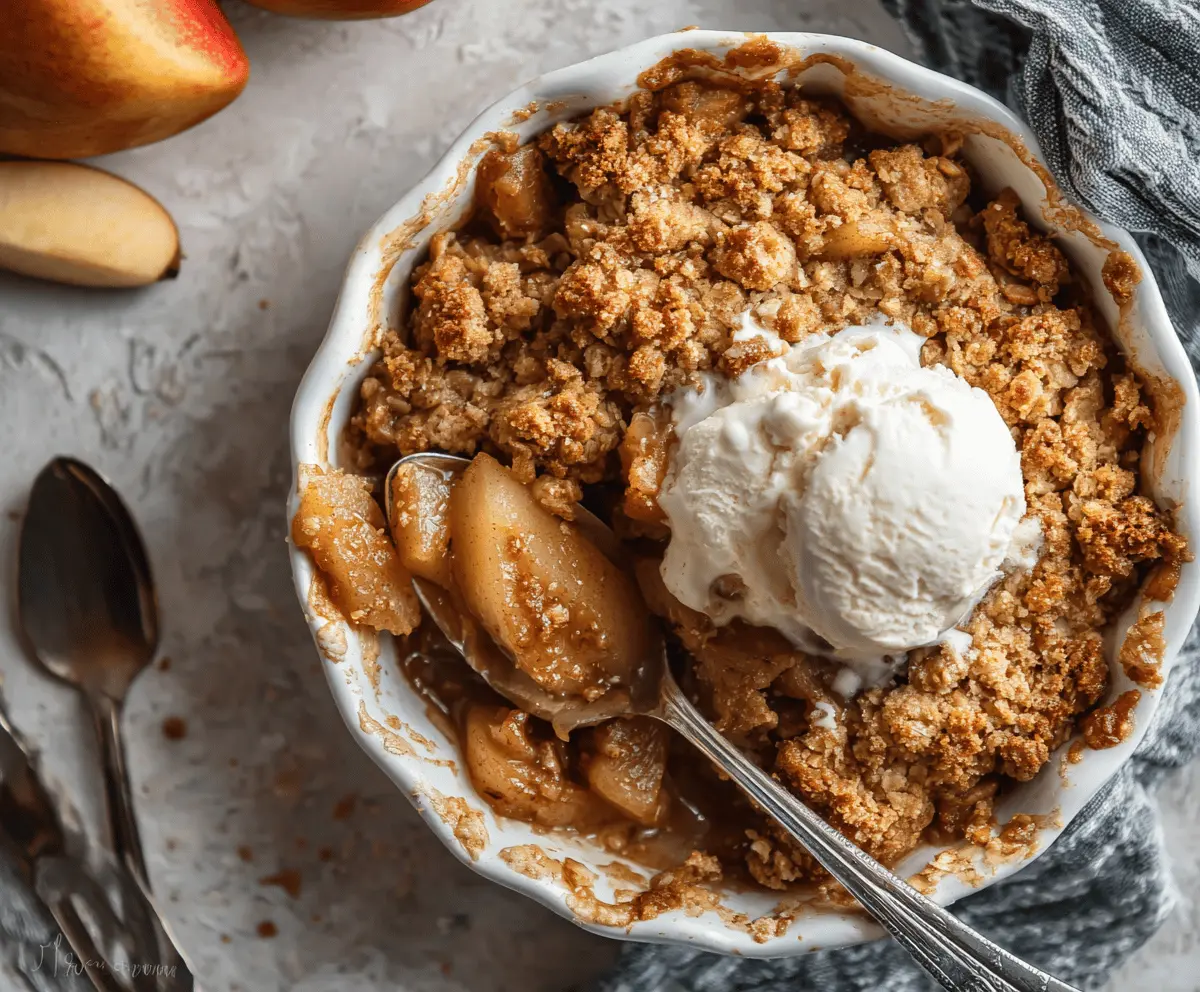
This Apple Pear Crisp is a warm, delicious dessert that highlights sweet apples and juicy pears. Topped with a buttery crumb mix, it’s like a cozy hug in a bowl!
Whenever I make this, my kitchen smells amazing! It’s super easy to whip up, and I love serving it with a scoop of ice cream on top. Yum!
Key Ingredients & Substitutions
Apples: Granny Smith or Honeycrisp are great choices for their tartness and firmness. If these aren’t available, Fuji or Braeburn can also work well. Just make sure to choose apples that won’t turn mushy after baking!
Pears: Look for ripe but firm pears, like Bosc or Anjou. If you can’t find these, any other pears you have on hand should be fine. Just steer clear of overly soft ones as they can get mushy during baking.
Sugars: I like using a mix of granulated and brown sugar for depth of flavor. You can use coconut sugar or maple sugar for a different taste. If you’re cutting back on sugar, feel free to reduce the amount or use a sugar substitute.
Oats: Old-fashioned rolled oats are a must for a good texture. You can substitute quick oats, but your crisp may be a bit softer. If gluten-free, make sure to use certified gluten-free oats!
What’s the Best Way to Achieve a Perfect Crisp Topping?
A great topping can make or break your Apple Pear Crisp, so here’s how to nail it:
- Mix dry ingredients in one bowl. Keep your butter cold! It’s what makes the topping flaky.
- Use your fingers or a pastry cutter to combine the butter with the dry mix until you see pea-sized crumbs. Don’t overwork it!
- If it feels too dry, you can add a tablespoon of water or more melted butter to bind it together.
- Spread the topping evenly over the fruit, ensuring it’s fully covered for a crunchy top.
With these tips, you’re on your way to a delicious Apple Pear Crisp that everyone will love. Enjoy your baking adventure!
Apple Pear Crisp
Ingredients You’ll Need:
For the Fruit Filling:
- 3 apples (such as Granny Smith or Honeycrisp), peeled, cored, and sliced
- 3 pears (ripe but firm), peeled, cored, and sliced
- 1/4 cup granulated sugar
- 1/4 cup brown sugar, packed
- 1 1/2 tsp ground cinnamon
- 1/4 tsp ground nutmeg
- 1 tbsp lemon juice
- 1 tbsp cornstarch (optional, for thickening)
For the Crisp Topping:
- 1 cup old-fashioned rolled oats
- 3/4 cup all-purpose flour
- 1/2 cup brown sugar, packed
- 1/2 cup unsalted butter, cold and cut into small cubes
- 1/2 tsp ground cinnamon
- Pinch of salt
How Much Time Will You Need?
This Apple Pear Crisp will take about 15 minutes to prepare and 40-45 minutes to bake. So, in total, you’re looking at around 1 hour to enjoy a warm and delicious dessert!
Step-by-Step Instructions:
1. Preheat and Prep:
First things first, preheat your oven to 350°F (175°C). Grab a medium-sized baking dish, and grease it lightly to prevent sticking. This makes cleanup so much easier!
2. Prepare the Fruit Filling:
In a large mixing bowl, toss together your sliced apples and pears. Sprinkle in the granulated sugar, brown sugar, cinnamon, nutmeg, lemon juice, and the optional cornstarch if you want a thicker filling. Mix it gently until all the fruit is nicely coated!
3. Layer the Fruit:
Carefully pour the fruit mixture into your prepared baking dish and spread it out evenly. This helps ensure every bite has that lovely flavor.
4. Make the Crisp Topping:
In another bowl, combine the oats, flour, brown sugar, cinnamon, and a pinch of salt. Now, add the cold butter cubes. Using your fingers or a pastry cutter, mix until it resembles coarse crumbs. Don’t worry about being perfect!
5. Assemble the Crisp:
Spread the crumbly topping over the fruit mixture evenly. This will create that delicious crust we all love!
6. Bake to Perfection:
Pop the dish in the oven and bake it for about 40-45 minutes. You’ll know it’s done when the topping is golden brown, and the fruit filling is bubbly around the edges. Your kitchen will smell wonderful!
7. Cool and Serve:
Once baked, remove the crisp from the oven and let it cool for a few minutes before serving. This waiting time is the hardest part! Serve it warm with vanilla ice cream or a dollop of whipped cream for an extra special treat.
Enjoy your cozy and delicious Apple Pear Crisp!
Can I Use Different Types of Fruit in the Crisp?
Absolutely! While the combination of apples and pears is classic, you can substitute with other fruits such as peaches, berries, or even cherries. Just keep in mind that some fruits may require less sugar, so adjust accordingly!
Can I Make This Crisp Gluten-Free?
Yes, you can! Swap the all-purpose flour for a gluten-free flour blend and ensure your oats are certified gluten-free. The flavor will still be delicious, and you’ll get that perfect crisp texture.
How to Store Leftovers?
Store any leftovers in an airtight container in the refrigerator for up to 3 days. To reheat, simply warm it in the oven at 350°F (175°C) until heated through, or microwave it for a quick option.
Can I Freeze the Apple Pear Crisp?
Definitely! You can freeze the unbaked crisp. Just assemble it, cover tightly with foil, and freeze for up to 3 months. When you’re ready to bake, you can cook it from frozen, adding a little extra time to the baking process.